Friday, 30 May 2014

Nursery for two! Decorating for a boy and a girl - Part 1

Since vast amounts of space and rooms are unavailable to us at present, DJ and EJ are sharing a room.  They are quite happy with this arrangement going by late night chats (ie down at 7.30 and still gabbling an hour later, haha! :o )  and they sleep well.  Other than sometimes waking up 2 hours earlier than they used to... but they enjoy each others company :)  So the big (ish) question was, how were we going to decorate the room to suit them both? 


Very quick back story - we'd been renting our house, got the offer to buy it and it has been ours since March.  The whole house was magnolia other than the kitchen and our bedroom wall as it is fairly new.  As we'd been renting we hadn't ever properly decorated DJ's room, just a few things on the wall.  All in all it's pretty much a blank canvas!


We decided to paint the walls a very light blue as it is obviously suitable for a boy and it would also go with EJ's pink things.  The room has been split up into three zones if you like (architecture brain :p) one side each that will be purely individual beside their cots and the back wall where the toybox is, was to be shared.


While we were away at Easter time, Mr P got cracking with the painting! We got some really cute woodland stickers from Mothercare and put them in on the wall beside the pirate chest toybox that Mr P made himself.  The room doesn't have a theme as such, just things we liked and thought they'd like.  DJ was wandering around the shop with the box of stickers so we gathered he liked them haha!


Next week it'll be about DJ's side of the room... :)

Kathelle x

Wednesday, 28 May 2014

Strandom is Open! :D x

Well the last week and a bit was rather crazy busy haha!  Official opening was on Friday night and I'm pleased to say it was a great success. 

After a week of seeing this:

 
and this, I finally felt I was getting somewhere!


 The finished pictures look so sane in comparison haha!  The above "burach" (Gaelic word for guddly mess!) is the result of trying to cut everything out as fast as I could before DJ & EJ woke up!

Remember this?
 

 It became one of three styles of coin purse in my Folksy shop :)


  And this pile of cut out fabric...


became this, the "Kirsty" bag :)


 I very much appreciate the help and support of friends and family, those who took the time to share my items on Facebook and Mr P. (my husband - so named by my sister a few years ago!) who had to put up with said burach for a few days!  And to those who ordered I sincerely hope you love your Standom makes :)


Now off to work on some orders! :D

Kathelle x

Monday, 19 May 2014

Sneak Peak...


 Some progress on the Strandom front...


Four days to go until shop opening!  I shall have to work like a busy bee to get it all done, so I'd better get cracking.  Didn't get as much done last week as I'd hoped, DJ & EJ keeping me busy :)

Kathelle x

Friday, 16 May 2014

Turtle turned tiny!


Before EJ was born I wanted to make her some wee dangling toys for her car seat or crib, like I'd done for DJ.  I was trying to think of an animal or something that would be relatively quick to make and have some sort of interactive quality (in other words, fun ;) )

Myrtle the Turtle

I came across two tutorials on making stuffed turtles, one was Myrtle the Turtle from Purl Bee (above) 


 and the other was Stuffed Fabric Turtles from Ashley at Make it & Love it.

Seeing as I was hoping to hang it from a bit of ribbon, I chose the Make it & Love it one as it seemed easier to put a ribbon in centrally.  Both these turtles are meant to be more teddy sized I think, but as I was wanting a dangly toy... I shrunk the pattern with a photocopier (I think it was 25-30%, can't remember now) and proceeded to pick my fabrics!


I didn't know whether EJ was going to be a boy or a girl (spoils the surprise!) so I went for more primary colours in high contrast and eye catching prints.  The higher the contrast the more stimulating for babies apparently!  So I went for big red spots, navy and white polka dots, a colourful vine pattern and a bold large blue paisley print for the shell and a kind of beige for legs, head and tails just to balance out the colorfulness.


And to continue with the contrast I used this fabric called doily dance by Michael Miller (I think! I got it a while ago) for it's tummy.  Theory being that if it's dangling she'd see the bottom as much as, if not more than, the shell :)


It looks like it's crawling towards you in this photo haha!  I used some cotton ribbon with an orange stitch detail for hanging and sewed Velcro to it so it could loop and hang on whatever it fit on.  


I was really pleased with how the shrunken version turned out though it was definitely not without problems!  It was mostly sewn on the machine, which was fine for the shell but the head/legs/tail were soo fiddly and three of them popped and ripped :( so I made some more and just cut longer bits of fabric so it wasn't so likely to break and put them in the turtle so they were the right length again.  And I added a wee bell to it's tummy so he'd jingle!

One happy EJ :) x

She seems to like it anyway... Have you any tales of improvisation to tell?  I have one or two more wee toys to show you over the next few weeks as well. 

Better go hang the washing, though I can't decide if it'll rain or not... typical! :)

Kathelle x


Tuesday, 13 May 2014

EJ's Quilt - Part 2


A wee update on the quilt! I've not managed to do a huge amount on it since last week.  It's all arranged - you can see the spares floating about in the corner of the photo - I had 9 in total, so I'll use them in the back of the quilt somehow, as this section is nine blocks wide by nine blocks tall.


I sewn up all the squares and blocks in columns and now I'm half way through sewing the rows together... I've done two more since this photo was taken.  I'm much happier with the colours in this version as they really pop and are very vibrant which is what I was hoping for.  Yay! (I'm sad I know...haha)


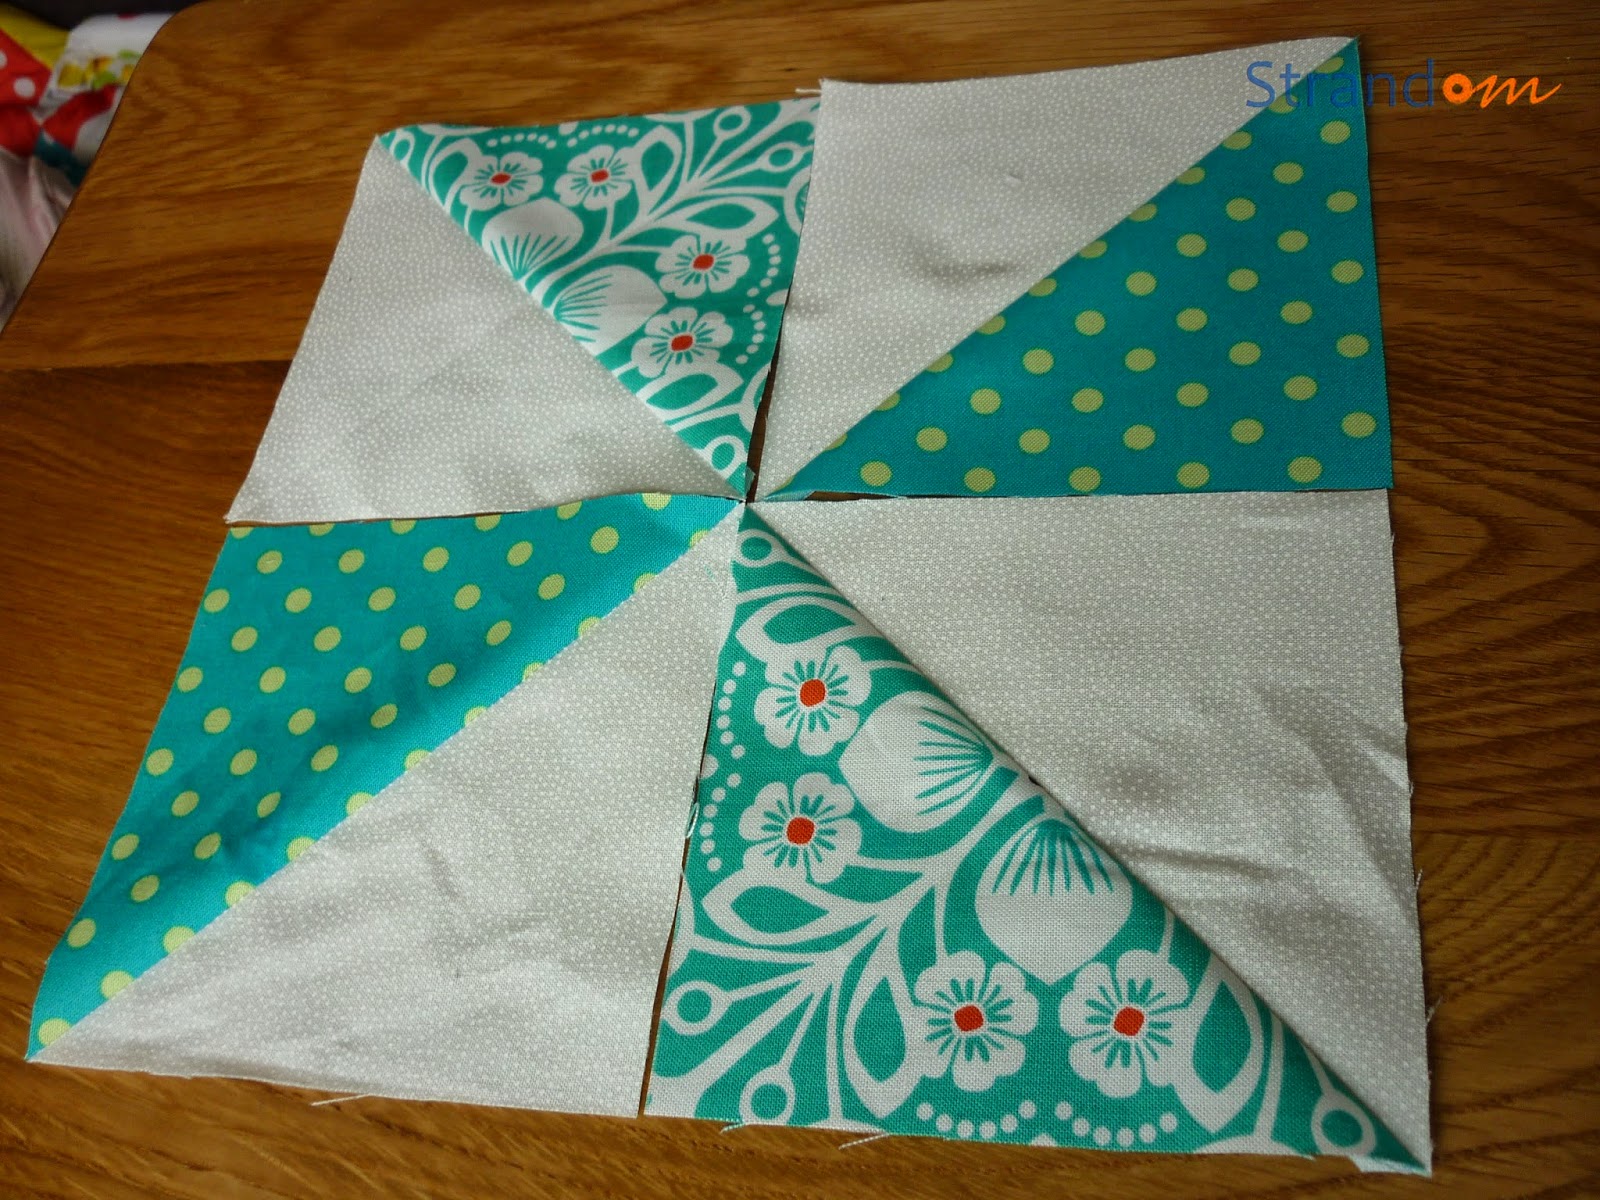
Close up of the centre of the quilt half sewn up.  I was trying to use a different colour of pinwheel on the corners of the large ones so they stood out a bit more.  For example I used blues and greens to frame the pink one below.


Now once the top's done, I need to decide how to quilt it.  If I were a wonderful expert with freehand quilting I would do swirls around the pinwheels like the wind... but I'm not, by any stretch of the imagination. :/ I may experiment and see how it goes, I just really think that straight line quilting wouldn't work on this pattern, it would lose it's freedom and fun, hmmm...  We'll see!

I had a rather busy weekend with having a brand new niece (though I've not seen her yet, I can not wait!) going to Aberdeen and church.  So I hope to have a productive week getting stock ready for Strandom and the usual household stuff :) And trying to finish this quilt top of course!

Kathelle x

Friday, 9 May 2014

Strandom - 2 weeks to go...

I received a few lovely parcels in the post this morning and earlier on this week which mean that I can finally get started on new projects for Strandom! I've been itching to get going for a while, though it won't be easy with the two little ones! I'll try my best ;)  Aiming for 23rd May... we'll see how it goes.


 DJ's at that stage where he's into everything... (It's a cliche for a reason!) I was working on EJ's quilt last night and he was going through the extra squares and using one to wipe his face as if it was a facecloth! pah, little boys haha!   Remember this from my last post? 

 
And he loved the new zips...  They are both down now (a wee bit of P&Q - also know as peace and quiet!) so I'm having a cup of tea while I sort these photos for you :)  

Eilean Glas lighthouse - stone wall by my very talented uncle!

 While I was home on holiday last month I popped up to Tarbert, thanks to my Dad for driving as I STILL have not got my license... one day!  I went into the Harris Tweed shop and dithered over the gorgeous choices while he drove the kids about to keep them happy :) Here's some of what I've chosen for Strandom.


The pink and blue with cream ones at the top of the above photo were woven by Heather, she has a Facebook page called Handmade by Heather - Isle of Harris. They're gorgeous, looking forward to seeing what else she does!  You can see the pink one more clearly in the middle photo.

Amazingly they are still sleeping, so I'll see what housework I can do before the little man gets up and EJ needs a feed!

Kathelle x


Tuesday, 6 May 2014

EJ's Quilt - Part 1


I found this quilt pattern on Pinterest a while back and loved it so much I just had to make it!  

It's called "Windy Days" and is by Sarah Meyer as part of Moda Bake Shop, which has heaps of ideas and projects for pre-cuts.


It seemed the perfect choice for a cot quilt for EJ when she gets big enough, which gives me a wee bit of time to get it sorted...  link to pattern here.


I found this cool pinwheel fabric at "The Sew Room" in Alford.  I wanted to include it somehow, but I couldn't quite decide how... (in typical fashion haha!)  Eventually, I decided to use it as the border fabric to make the quilt a bit bigger, and I used it to select the colours for the pinwheels.  
 There's blues, pinks, purples, greens and a little bit of orange, which sounds a bit mental written down but it looks really good.


 The pattern is technically for a charm pack and that would be the easiest and most sensible option, but I couldn't see any that I liked enough in the right colours.  So, I bought some fat quarters in bold, punchy colours like pinks, orange, teal and purple and cut my own "charm pack" (a charm pack is a pre-cut pack of 5" fabric squares)  I also cut far too many in my enthusiasm... so, I'll pick the best and use the rest in the back somehow haha! :)


Whilst feeding EJ a few months ago (she's 5 months now) I watched a few Eleanor Burns videos on youtube and learnt this "swirling" technique for the back which works soo much better that whatever I used to do.  This is only my second quilt, the first one I made was for DJ, I'll show pics of it in another post.


 This was the first attempt at the layout when I'd sewn enough pinwheels together.  I wasn't too happy with it as the colours were nice but it was a bit pilly wally... and lacked the bold colourful look I was wanting for it.  


Solution: more contrast and more turquoise!

The large pinwheel at the top right didn't stand out enough either so I changed it from this


 to this, and I'm so much happier with it.


slightly crumpled by a little boy!
more crumpling... haha!
and I lost one :( (not his fault, mine this time!)
Only one lost casualty which wasn't too bad going with the to-ing and fro-ing and floating about for a month or so waiting patiently on the table.  I'll try to arrange it again soon, but it'll have to be in the evenings or there'll be a pinwheel thief on the loose! (Can you tell I tried it before... bad plan, haha!)

Kathelle x

Thursday, 1 May 2014

Sprocket Cushion Tutorial

Last year I made this cushion for a friend's birthday present.  It was great fun to do as you could pick loads of different fabrics for one project, but it would work equally well with only 2 or 3 patterns/colours.   

This is the tutorial I used to make it - this lady's blog has heaps of other great ideas too!


I was aiming for a random shabby chic pretty kind of look for it, trying not to be too matchy.  The faric wedges were arranged so that none of the same fabric was directly opposite, as I had used two of some of my favourite fabrics.  


A good range of lights, mid tones and darker fabrics, as well as plains and patterns were used to keep it really interesting and eye-catching.  

You can probably tell I think a little bit too much about these things, haha!  


The centre button was covered with another co-ordinating fabric.  I tried to use some of the fabric I had in the wedges but it didn't quite look right, whereas this fabric picks out the red accent and really lightens up the middle of the cushion.   

The button also makes this very forgiving to make if your points aren't exact, it'll hide the mistakes! ;)

 Sewing the button on was probably the most fiddly bit as you're going through all the stuffing and pulling it tight too.  You could also try and put another button on the back and make it reversible.  I left it plain and used this lovely script fabric from The Sew Room in Alford as the backing.


It's a great project to use up scraps or if you simply can't choose which fabric to start with!
I tried something similar with larger wedges out of Harris Tweed but it didn't really work sadly... it was too bulky and it somehow became too small...(don't quite know what happened haha!) so I turned it into this heart for my Folksy shop!


  I may try again, alternating cotton and tweed...? not sure if that'd work either but I think it would look pretty cool.

Here's the link again if you want to give it a go yourself!
http://www.cluckclucksew.com/2011/03/tutorial-sprocket-pillows.html


Kathelle x