Showing posts with label projects. Show all posts

Friday, 16 January 2015

2015 To Do list... as opposed to resolutions!


I shouldn't have mentioned diaries in my last post, it was bound to be a few months until I'd be back on here, haha! 

2014 was quite a tough year for me for many reasons, so I hope to make 2015 what it could and should be.  I have a few updates to post in the coming weeks on previous projects and some new ones as well!  

I've also ventured into the world of dressmaking...  My To Do list is as long as ever, so here's a snippet of what's on it and what I plan to work on in the near future, DV.

I have six PDF patterns from The Peekaboo Pattern Shop on Etsy to work on, four of which I have done or intend to do soon.  (I got them for Christmas!) These four are:
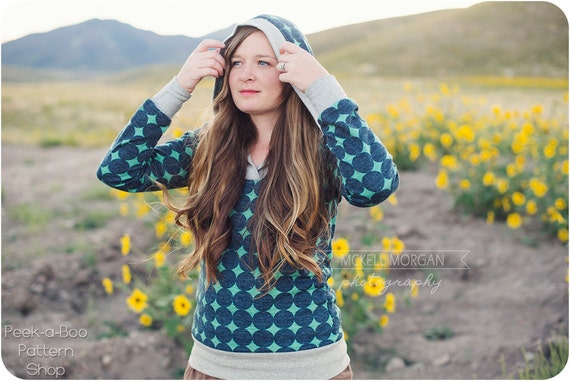
Hampton Hoodie: Women's Hoodie Sewing Pattern, Shirt Sewing Pattern for Women
The Hampton Hoody for myself
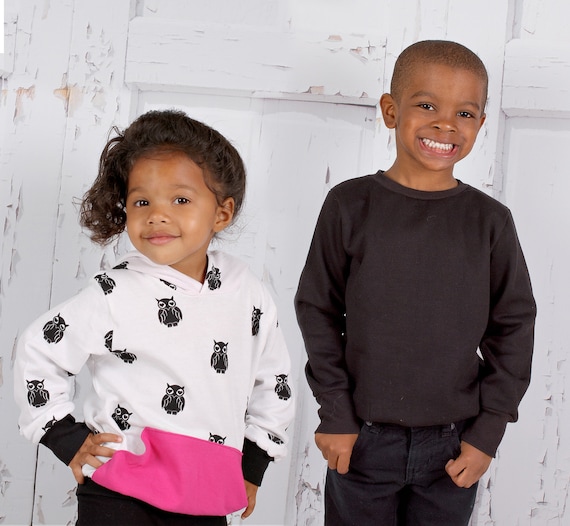
Classic Sweatshirt: Hoodie Sewing Pattern, Sweatshirt Sewing Pattern
The Classic Sweatshirt for Miss EJ

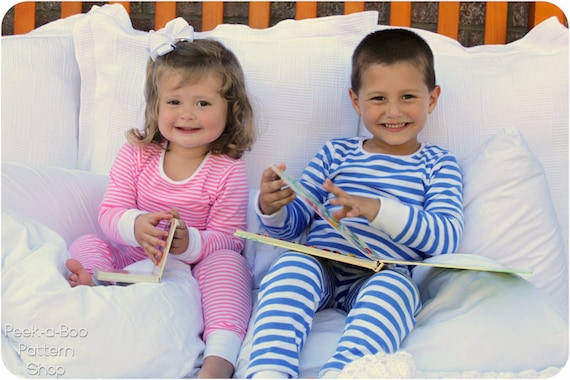
Alex and Anna Winter PJs for both DJ and EJ
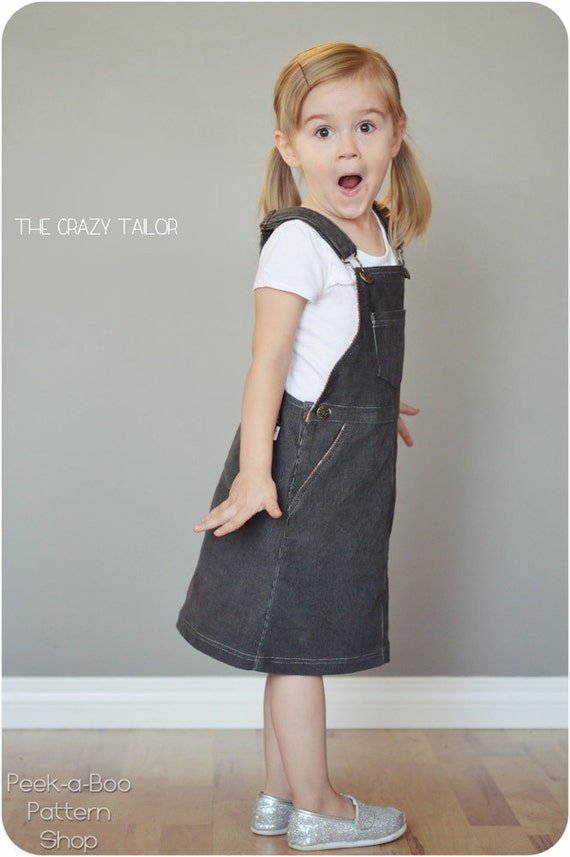
Oopsy Daisy Overalls Jumper: Jumper Sewing Pattern, Jumperalls, Overalls Jumper Pattern
Oopsy Daisy Overalls Jumper for Miss EJ


 I also got the Classic Chinos and the Classic Oxford Button Up Shirt patterns for when required... It was so hard to stick to just five or six.  I think they'll prove very useful and wearable with potential for variations.  The great thing about the kids patterns especially is that they have such a great range of sizes, a lot go up to age twelve! You could definitely get your money's worth with these.

Also on the To-Do List (no, that's not enough...)  is finish piecing DJs "Double Crossed Quilt" by Amy Smart of Diary of a Quilter.  I chose similar colours to those in her quilt, with added cars and planes and diggers for a vehicle mad little boy! It's the twin size I'm working on, so there's no major hurry as such... ahem...
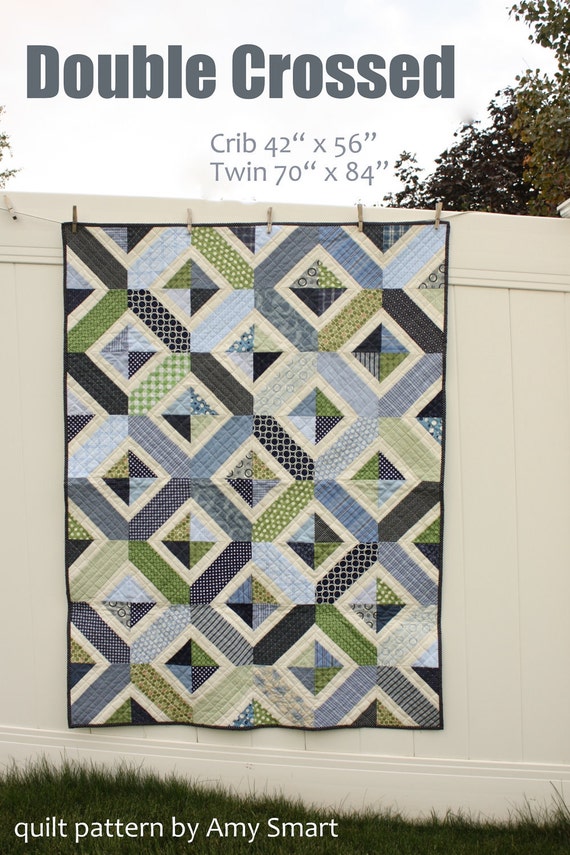
Double Crossed Quilt PATTERN
 

Last year, I purchased the Moneta dress pattern by Colette and really wanted to get started but can't decide what fabric to make it in... it needs three metres of jersey and I really want to love my choice before buying anything.

Oh and on a slightly urgent note, Mr P. needs work shirts!

There's probably more ideas lurking in the far corners of my brain and Pinterest, but that should keep me busy for now!  My lists are legendary.

I'll be posting updates on my 2015 To Do list to keep you informed on my progress.  

What's on your sewing list? Please comment if you have one too :)


Kathelle x

Friday, 13 June 2014

Nursery for two! Decorating for a boy and a girl - Part 3


As part of the room "makeover", one of the first things we did was get rid of old mismatched furniture (well, hid one in the wardrobe and put the broken one to local recycling!).  We bought a new cabinet from Argos, to match the chest of drawers, to store their books and what had been in the old bedside cabinets.  

It's amazing how much surface space it cleared up! The books were just piled up because we had nowhere to put them, and DJ couldn't reach them... :(


http://argos.scene7.com/is/image/Argos/1834392_R_Z002A_UC1572195?$TMB$&wid=312&hei=312
Kids Scandinavia 4 Cube Storage Unit
When it arrived, I thought I'd save Mr P. a job, as he's always so busy on Saturdays, and decided to put it together myself.  I rather enjoy building the old flatpack furniture haha!  However, I did not quite bargain for a cheeky little 18 month old in the process...  Whilst EJ was asleep we put it together, and remarkably all was going rather well (considering a little boy's liking for wood and tools...) until I had to put the top on.  

  I just managed to align the dowels and screws on one side, I moved to the other side to align that - and DJ goes and pulls the first side to "help" thus undoing my good work!  Cue exasperated but rather amused mother, haha!  I tried again to no avail, nearly lined up... and then pop! DJ was at it again.  At this point I plonked him in his cot so he could watch but not touch haha!  Otherwise I honestly think I'd still be at it ;)


Anyway, Mr. P. was very happy and proceeded to beeswax it at the next opportunity (the furniture is unfinished on arrival).  We then covered the rather dull chipbboard shelf backing with a lovely bright starry fabric with some PVA spread over the surface as evenly and relatively thinly as possible before it was pinned in place.  And voila!  Much better! :)  Now he can reach his books, he loves reading them and even tries to read them to his wee sister sometimes!
  Next post on this will be on EJ's side which is as yet very blank...:(  I have ideas and the materials but it needs done! :)

Kathelle x

Friday, 6 June 2014

Nursery for two! Decorating for a boy and a girl - Part 2 - DJ's side (Magazine Collage Tutorial)

DJ's side of the room really suits him now.  We put up Mr P.'s tool clock and two collage canvases which we made ourselves.  (I know it looks a wee bit bare at the bottom but it is deliberate so that he can't touch them!)


The first canvas has quite a story to it.  Mr P. loves his Land Rovers.  He used to have heaps of magazines, but one day decided to have a clear out.  At this point we were just going out, so he showed me his favourites he'd saved that Saturday morning when I went over to visit.  We eventually came up with the idea of making a collage on a canvas with them - rather than keeping them hidden in a folder or drawer.  Anyway, off we went for a spin to Haddo House, came back with a sparkly ring ;) and Hobbycraft was first on our list of places to go, haha!  With the canvas bought, we finished the collage that evening - so it's quite special to us both :) 


It's quite a deep canvas, so we found as many landscape images as we could in the magazines, cut them out and arranged them on the canvas so that there was enough to completely cover the sides - we probably had about 10 magazines to work with so there was plenty choice!  Some of Mr P.'s favourites were very carefully cut out to go over the landscapes to blend it together as one image.  For example, the one in the bottom right corner looks as if it's coming out of that valley, and the top right corner looks like it's going along that road, whereas it was actually us that put them there as a wee story :)  And to finish it off, we put a little Land Rover badge  in the top left corner :)  So after 3 years in 3 sitting rooms it moved into DJ's room, passed on to him!

To keep the Land Rovers company, and as this wee boy is fond of any vehicle that has wheels and an engine, we made a similar one with tractors!  Rather appropriate for here as a farming community, and this time it was DJs Great Auntie and Uncle who donated the magazines :)


This one took us much longer than the Land Rover one as we had less to work with (just 2 magazines) and the canvas size and shape proved a bit more complicated to fill nicely.  After many weeks of being hidden under the blanket box, on the table and in the wardrobe it was completed!

This one was done in a similar way with finding landscape photos (very few and far between!) to cover the blank bits and edges and carefully arranged it all so it looked good.  Below you can see the tractor has been carefully cut out around the front wheel and nose and then the trees in the background were cut to mimic those in the landscape photo!  This was Mr P.'s creativity :)  After it as finished and stuck down we went over it with  a few coats of PVA, but it went a bit wrinkly :(  We used spray mount for the LR one, then PVA coats and it definitely worked better than using PVA the whole way through.  We put a logo from the obliging magazine in the bottom left corner to finish, and DJ loves it!


It's a great way to re-use magazines - I'd love to do one with flowers from gardening magazines or castles and stately comes from National Trust magazines... Many posibilities and it cheers up a room in a personal way without costing much. :) If you have the magazines in and gathering dust that is, they can be so expensive! 

I'd love to see if any of you give it a try or if you've done anything similar!  DJ loves it and makes grunty engines noises when he sees them haha! :D

Kathelle x

Friday, 16 May 2014

Turtle turned tiny!


Before EJ was born I wanted to make her some wee dangling toys for her car seat or crib, like I'd done for DJ.  I was trying to think of an animal or something that would be relatively quick to make and have some sort of interactive quality (in other words, fun ;) )

Myrtle the Turtle

I came across two tutorials on making stuffed turtles, one was Myrtle the Turtle from Purl Bee (above) 


 and the other was Stuffed Fabric Turtles from Ashley at Make it & Love it.

Seeing as I was hoping to hang it from a bit of ribbon, I chose the Make it & Love it one as it seemed easier to put a ribbon in centrally.  Both these turtles are meant to be more teddy sized I think, but as I was wanting a dangly toy... I shrunk the pattern with a photocopier (I think it was 25-30%, can't remember now) and proceeded to pick my fabrics!


I didn't know whether EJ was going to be a boy or a girl (spoils the surprise!) so I went for more primary colours in high contrast and eye catching prints.  The higher the contrast the more stimulating for babies apparently!  So I went for big red spots, navy and white polka dots, a colourful vine pattern and a bold large blue paisley print for the shell and a kind of beige for legs, head and tails just to balance out the colorfulness.


And to continue with the contrast I used this fabric called doily dance by Michael Miller (I think! I got it a while ago) for it's tummy.  Theory being that if it's dangling she'd see the bottom as much as, if not more than, the shell :)


It looks like it's crawling towards you in this photo haha!  I used some cotton ribbon with an orange stitch detail for hanging and sewed Velcro to it so it could loop and hang on whatever it fit on.  


I was really pleased with how the shrunken version turned out though it was definitely not without problems!  It was mostly sewn on the machine, which was fine for the shell but the head/legs/tail were soo fiddly and three of them popped and ripped :( so I made some more and just cut longer bits of fabric so it wasn't so likely to break and put them in the turtle so they were the right length again.  And I added a wee bell to it's tummy so he'd jingle!

One happy EJ :) x

She seems to like it anyway... Have you any tales of improvisation to tell?  I have one or two more wee toys to show you over the next few weeks as well. 

Better go hang the washing, though I can't decide if it'll rain or not... typical! :)

Kathelle x


Tuesday, 13 May 2014

EJ's Quilt - Part 2


A wee update on the quilt! I've not managed to do a huge amount on it since last week.  It's all arranged - you can see the spares floating about in the corner of the photo - I had 9 in total, so I'll use them in the back of the quilt somehow, as this section is nine blocks wide by nine blocks tall.


I sewn up all the squares and blocks in columns and now I'm half way through sewing the rows together... I've done two more since this photo was taken.  I'm much happier with the colours in this version as they really pop and are very vibrant which is what I was hoping for.  Yay! (I'm sad I know...haha)


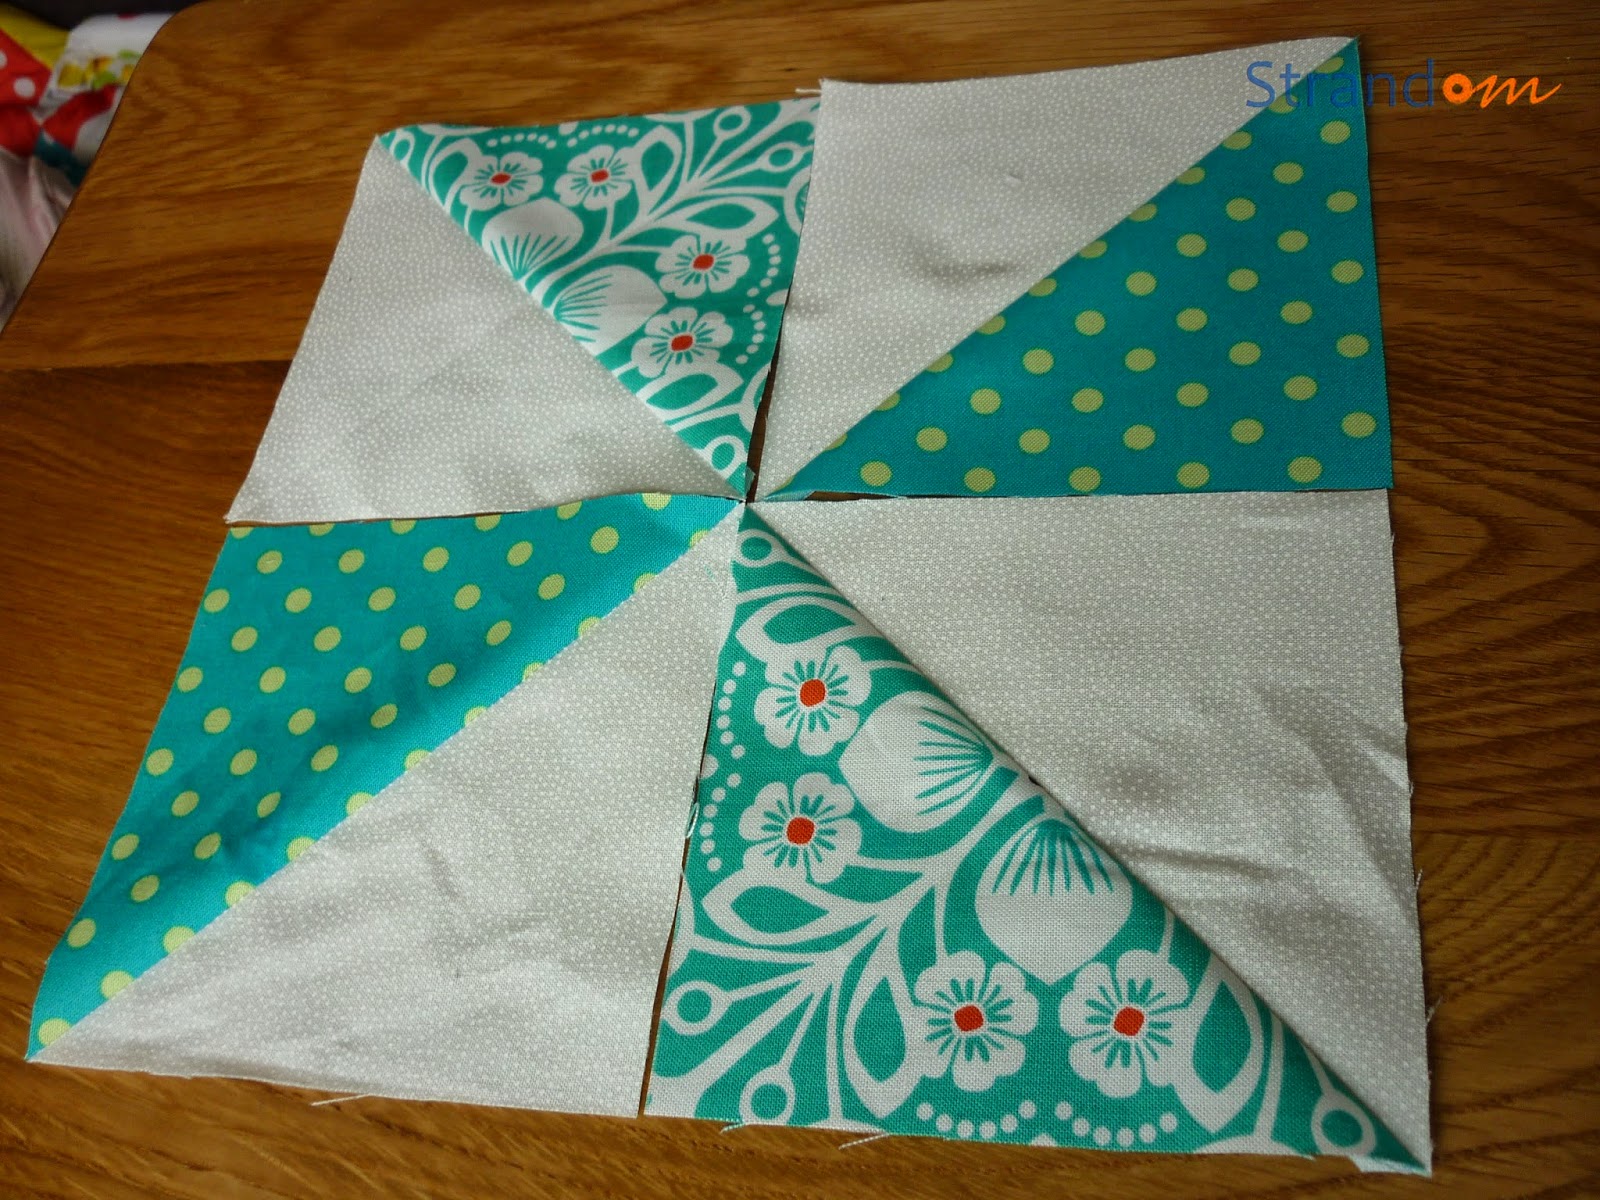
Close up of the centre of the quilt half sewn up.  I was trying to use a different colour of pinwheel on the corners of the large ones so they stood out a bit more.  For example I used blues and greens to frame the pink one below.


Now once the top's done, I need to decide how to quilt it.  If I were a wonderful expert with freehand quilting I would do swirls around the pinwheels like the wind... but I'm not, by any stretch of the imagination. :/ I may experiment and see how it goes, I just really think that straight line quilting wouldn't work on this pattern, it would lose it's freedom and fun, hmmm...  We'll see!

I had a rather busy weekend with having a brand new niece (though I've not seen her yet, I can not wait!) going to Aberdeen and church.  So I hope to have a productive week getting stock ready for Strandom and the usual household stuff :) And trying to finish this quilt top of course!

Kathelle x

Tuesday, 6 May 2014

EJ's Quilt - Part 1


I found this quilt pattern on Pinterest a while back and loved it so much I just had to make it!  

It's called "Windy Days" and is by Sarah Meyer as part of Moda Bake Shop, which has heaps of ideas and projects for pre-cuts.


It seemed the perfect choice for a cot quilt for EJ when she gets big enough, which gives me a wee bit of time to get it sorted...  link to pattern here.


I found this cool pinwheel fabric at "The Sew Room" in Alford.  I wanted to include it somehow, but I couldn't quite decide how... (in typical fashion haha!)  Eventually, I decided to use it as the border fabric to make the quilt a bit bigger, and I used it to select the colours for the pinwheels.  
 There's blues, pinks, purples, greens and a little bit of orange, which sounds a bit mental written down but it looks really good.


 The pattern is technically for a charm pack and that would be the easiest and most sensible option, but I couldn't see any that I liked enough in the right colours.  So, I bought some fat quarters in bold, punchy colours like pinks, orange, teal and purple and cut my own "charm pack" (a charm pack is a pre-cut pack of 5" fabric squares)  I also cut far too many in my enthusiasm... so, I'll pick the best and use the rest in the back somehow haha! :)


Whilst feeding EJ a few months ago (she's 5 months now) I watched a few Eleanor Burns videos on youtube and learnt this "swirling" technique for the back which works soo much better that whatever I used to do.  This is only my second quilt, the first one I made was for DJ, I'll show pics of it in another post.


 This was the first attempt at the layout when I'd sewn enough pinwheels together.  I wasn't too happy with it as the colours were nice but it was a bit pilly wally... and lacked the bold colourful look I was wanting for it.  


Solution: more contrast and more turquoise!

The large pinwheel at the top right didn't stand out enough either so I changed it from this


 to this, and I'm so much happier with it.


slightly crumpled by a little boy!
more crumpling... haha!
and I lost one :( (not his fault, mine this time!)
Only one lost casualty which wasn't too bad going with the to-ing and fro-ing and floating about for a month or so waiting patiently on the table.  I'll try to arrange it again soon, but it'll have to be in the evenings or there'll be a pinwheel thief on the loose! (Can you tell I tried it before... bad plan, haha!)

Kathelle x

Thursday, 1 May 2014

Sprocket Cushion Tutorial

Last year I made this cushion for a friend's birthday present.  It was great fun to do as you could pick loads of different fabrics for one project, but it would work equally well with only 2 or 3 patterns/colours.   

This is the tutorial I used to make it - this lady's blog has heaps of other great ideas too!


I was aiming for a random shabby chic pretty kind of look for it, trying not to be too matchy.  The faric wedges were arranged so that none of the same fabric was directly opposite, as I had used two of some of my favourite fabrics.  


A good range of lights, mid tones and darker fabrics, as well as plains and patterns were used to keep it really interesting and eye-catching.  

You can probably tell I think a little bit too much about these things, haha!  


The centre button was covered with another co-ordinating fabric.  I tried to use some of the fabric I had in the wedges but it didn't quite look right, whereas this fabric picks out the red accent and really lightens up the middle of the cushion.   

The button also makes this very forgiving to make if your points aren't exact, it'll hide the mistakes! ;)

 Sewing the button on was probably the most fiddly bit as you're going through all the stuffing and pulling it tight too.  You could also try and put another button on the back and make it reversible.  I left it plain and used this lovely script fabric from The Sew Room in Alford as the backing.


It's a great project to use up scraps or if you simply can't choose which fabric to start with!
I tried something similar with larger wedges out of Harris Tweed but it didn't really work sadly... it was too bulky and it somehow became too small...(don't quite know what happened haha!) so I turned it into this heart for my Folksy shop!


  I may try again, alternating cotton and tweed...? not sure if that'd work either but I think it would look pretty cool.

Here's the link again if you want to give it a go yourself!
http://www.cluckclucksew.com/2011/03/tutorial-sprocket-pillows.html


Kathelle x